Opening a store on Inktastic is free. What makes Inktastic unique among the other POD’s like Cafepress and Zazzle, is that Inktastic hosts your store on their servers but on your domain or subdomain.
You decide where you want your shop to live and your shop has its own shopping cart. This is another unique feature of Inktastic, the shopping cart on your site is not shared or networked to the marketplace or to yours or anyone else’s shops. This can be an advantage on several levels.
To set up an Intastic shop you must first decide if you want to assign an unused root domain to it or if you’d rather create a subdomain of an existing domain (ie: shop.mydomain.com or inktastic.mydomain.com)
Once you decide you must set the cname and A record of your domain or subdomain to point to Inktastic’s servers, 38.113.112.144 This is easier than it sounds. And it’s explained below, for both scenarios.
Pointing a Domain to use for Your Inktastic.com Store:
1. Log in to your Domain registrar. (For this example we are using Namecheap.com.) to create july4thclothing.com.
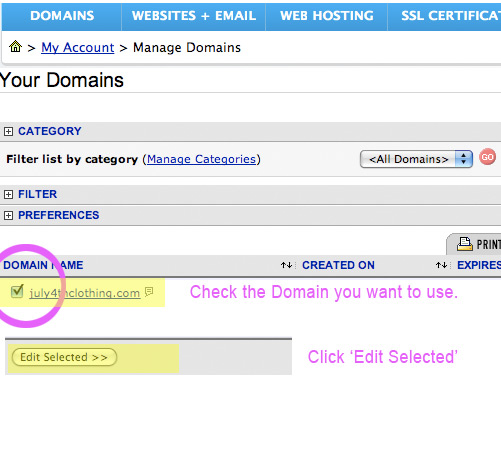
2. Go to manage domains.
3. Check the box next to the domain you wish to use for your Inktastic store, then click ‘edit selected.’
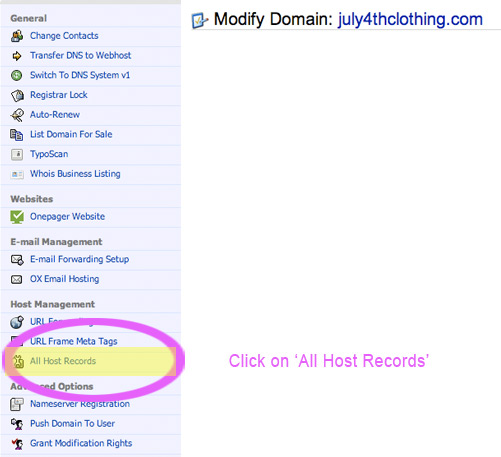
4. On the modify domain page, on the left nav, select ‘All Host Records’.
5. In the two IP address fields, type in Inktastic’s IP address: and make sure the records are set to A.
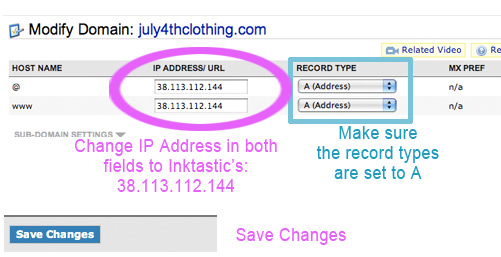
6. Save changes and you’re done.
Assigning a Subdomain for your Inktastic Store:
1. Log in to your web hosting account for the domain you want to create a subdomain for. (For this example we are using Knownhost.com to create a subdomain, http://shop.lesrubadesigns.com)
2. Go to your cpanel for that domain.
3. Look for the icon that says Subdomains and click it.
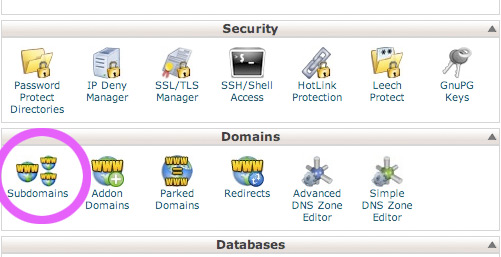
4. Name your subdomain – it can be something like shop, store, inktastic, etc. Click ‘create’.
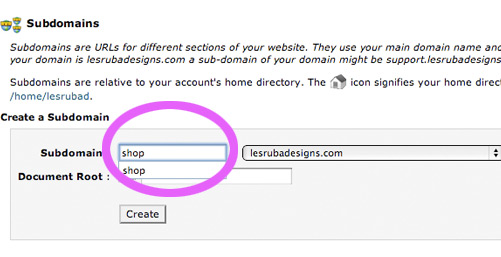
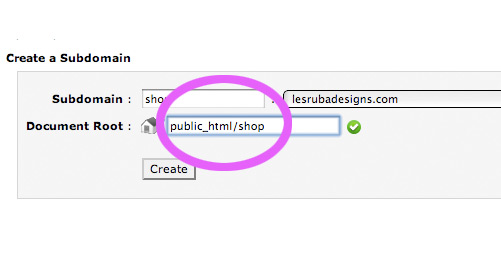
Once you type in the subdomain, the other Document Root field will fill in automatically.
5. Go back to your cpanel and look for the icon that says ‘Advanced DNS Zone’. Click it.

6. Scroll down the list of domains listed until you find the subdomain you just created. Check the ‘edit’ button, under actions, next to it.
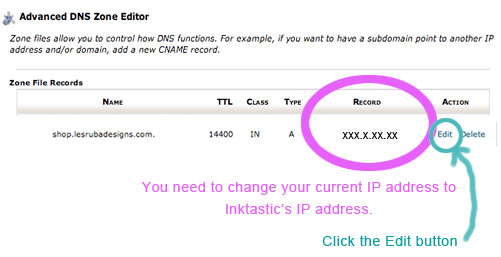
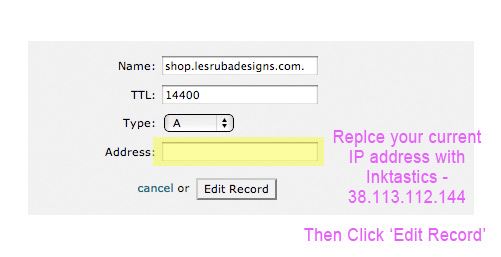
7. A few fields will open up underneath. Change the existing IP address to Inktastic’s IP – 38.113.112.144. Then click ‘edit record’ and you’re done.
Create New Shop in Inktastic
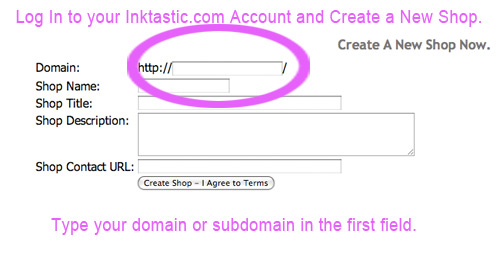
1. Once you have chosen and set servers for either your domain or subdomain, Log into or create a new Inktastic.com account and Create a new shop.
Visit our Inktastic Store here – Lesruba Designs Inktastic Store
Leave a Reply